
eStick
The eStick is a small USB based electronic device that comprises an AT90USB162 8-bit microcontroller, 8 bright LEDs, an interface for an optional Bluetooth module and a simple expansion interface. The purpose of the eStick is to get in contact with Electronics in a simple, yet interesting way without the hassle of complex theory.
WinAVR & AVR Studio Getting Started using C
Software, Installation and Usage Instructions
In this section you will find free development software that allows you to learn and design applications for the eStick.
What is a flashtool and what can be done with it?
Answer: A flashtool allows you to program a file or program image (a file in Intel-Hex format *.hex) from a personal computer to the
eStick. Therefore the eStick must be connected to a USB port on the PC in boot mode; this is done by holding the button on the eStick
pressed while connecting the eStick to the USB port. Once programed this program image will execute whenever the eStick is powered in
normal mode; the latter is reached when the eStick is either supplied with a battery (e.g. a 9V block) or connected to free USB port, this
time, however, without holding the button pressed. A flashed program image resides in the eStick until a new one is programed to the eStick
by (1) erasing the entire chip and (2) programming the new program image.
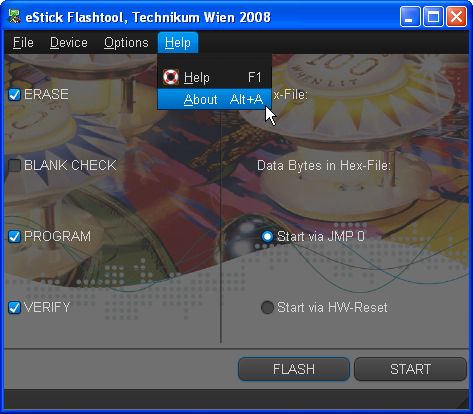
Option 1 :: eStickFlashTool (FH Technikum Wien - Electronic Engineering)
- Installation and Usage Instructions
- GTK+2.0 v2.12.10 (3.8MB, Installer with Themes, 14/07/2008)

GTK+2.0 is natively available for all Linux distributions anyway.
- eStickFlashTool v0.1
- Installer (950KB, Installer, 14/07/2008)
- Source Code (650KB, requires GTK+2.0 development libraries, 14/07/2008)
- Installer (950KB, Installer, 14/07/2008)

Option 2 :: Flip (Atmel Cooperation)
Integrated Development Environments (C-Compiler, Assembler, Simulator, Debugger, etc.):
What are these tools for? Several development tools allow you to design and realize your applications. On the software side you
need some kind of reasonable good text editor, a compiler that translates program code to binary images that can execute on a
microcontroller and some simulator and/or debugger that aids you in the development process in order to track down bugs that will show up
during the development.
Recommended: Install WinAVR & AVR Studio 4 and follow the instructions in the WinAVR & AVR Studio Getting Started using C.
Optional: If you prefer, however, to use WinAVR standalone then follow the instructions found in Getting Started with WinAVR using C.
- WinAVR (mandatory when programming in C)
- AVR Studio 4 :: Download from Atmel (registration required) or Atmel Norway. (mandatory
if you want to simulate your program)
- AVR Plugin for Eclipse (optional, requires Eclipse IDE for C/C++)

- For almost all Linux distributions there exist several AVR related tools
(gcc-avr, avr-libc, binutils-avr, gdb-avr, simulavr, avrdude, dfu-programmer, uisp, etc).
See the package manager of the distribution on how to install these; the following install options are valid for Ubuntu.
sudo apt-get install gcc-avr avr-libc binutils-avr gdb-avr avrdude
                     uisp dfu-programmer
- Mac OS X AVR Tutorial by J. Hausladen
- Code::Blocks (requires
avr-gcc resp. WinAVR, a nightly build is required)
Projects
Several small projects shall illustrate how the eStick can be used in various different applications.
LED Examples: These examples illustrate the usage of the onboard LEDs
along with software delay functions provided along with the WinAVR libraries.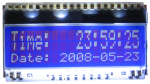
LCD Examples and Libraries
Numeric LCD: A Numeric LCD C-Library to interface with DOG LCD-modules from Electronic Assembly via SPI written by Jordacijevic Serz. Priced at about 20 Euros these modules can be purchased from CONRAD.DE or REICHELT with various different background lights. The EA DOG-M datasheet provides instructions on how to connect the DOG LCD-module in 3.3V SPI mode (see page 4 lower left figure; PB1 = CLK, PB2 = SI, PB4 = RS, PB5 = CSB) and how to initialize the module (page 7, EA DOGM163, 3.3V).
Documentation
- eStick Schematics
- eStick Partlist
- Volume Production: eStick Gerber Files (the layout is for a small series production optimized for the process of WEDirekt; small batches can be assembled e.g. by TeamStyria - they have the respective stencil and manage ordering of parts)
- Production of a single eStick: eStick Gerber Files (1: you need to order a PCB from a PCB manufacturer, e.g., www.pcb-pool.de with the provided files; 2: you will need to order the parts, e.g. from www.farnell.at; 3: you need someone skilled to solder the SMD parts onto the PCB)
- AT90USB162 Datasheet
- USB DFU Bootloader Datasheet
Links
- ATMEL Corporation
- AVR Freaks :: Tutorials, Foren, Projekte
- mikrocontroller.net :: Tutorials, Foren, Projekte
- Portable WinAVR :: Portable Version of WinAVR, Bootloader, Example Programs, etc.
- AVR-GCC Artikel auf roboternetz.de
- AVR-GCC Toolchain
- AVR-Libc (C library for use with GCC on Atmel AVR microcontrollers)
- AVR Microcontroller
Programming on a Mac

Last Update: 14-07-2008